Get your FREE GUIDE '7 Steps to grow a Quilt Pattern Design Business'

3 ways to organize your photos – for creatives and quilters
Some tactics to get started tackling that towering digital mound of images.
Are you like me? Do you have thousands upon thousands of photos on your camera roll, google drive, icloud, that sit there and gather digital dust and the thought of even going through them all just makes you want to lie down?
Yeap, I know the feeling. Over time I have come up with a few ways to battle this and also get to a place where I can actually find the damn photo I am looking for without scrolling for 3 weeks through my timeline.
So here are 3 ways to organize your photos, for creatives and quilters.
we have different needs
I think as creative people we have kind of a different set of needs when it comes to managing our photos than say someone who is primarily concerned with family snaps and occasions.
We take photos of all kind of random things. Example in case:
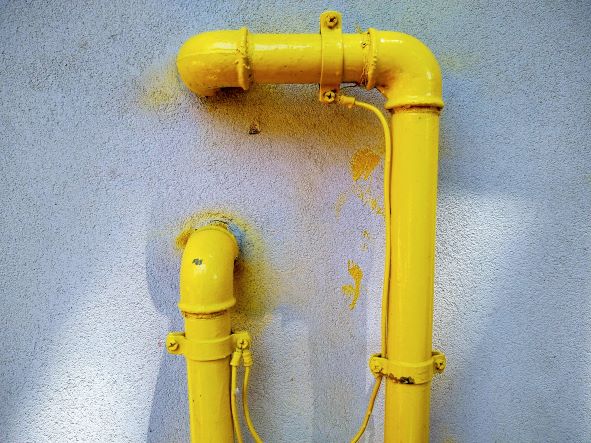
So, there is probably not a one size fits all, but here are some tactics to at least get started tackling that towering digital mound of images.
1. categorize & create
We all have them. Those groups of images we seem to repeatedly snap pictures of. Maybe you are attracted to taking photos of colours, or trees, or animals, or weird shapes, or amazing quilt composition ideas.
How do you go back and see these all side by side for comparison, or for consolidation of your ideas?
If they’re not organized, it is very hard to be able to compare and contrast ideas, or even track them over time. One way to overcome this might be to create albums of these seemingly random pictures. You’d be surprised at how often you take photos of similar things.
Create categories for your images and name albums based on this.
Come up with a series of categories that speak to the associations you have with the photos you take.
Here are some of the categories I have in my albums:
Abstracts
Yellow
Texture
Shadows
Nature
Quilts
Stitching
What are the names of some categories for your photos? Think about how you associate your images. Are you normally grouping these images in your mind by colour? Place? Subject matter? Texture? Line?
How would you search for something?
2. review review review
Set a scheduled time to review your photos and categorize the ones you will want to refer back to.
This. Is. So. Important.
It is so easy to take photos. Hundreds, thousands of the things.
But what is the purpose of taking the photo in the first place?
Is it really just Fear of Missing Out? Quick! Preserve the memory! Or is it to remind yourself of an idea you want to return to? If you want to actually go back and look at the photo, instead of ‘make memories’, then you need a strategy to review the photos you took.
Set a time interval for reviewing your photos.
I have a monthly time scheduled, but honestly, I think I would be better off doing this weekly. Once you have decided on a schedule, PUT IT IN YOUR CALENDAR. Maybe you know that once a month you will be waiting in line for xyz, schedule your photo organization.
Got a doctors/physio/dentist/other appointment? Instead of aimless scrolling, develop the habit of reviewing photos during the waiting room wait. Build a habit on this, so eventually you will automatically open your phone to photos and not whatever social feed while you are waiting. Kids sport practice? Pickup line at school?
What other cracks could you fill with this task instead of aimless social media consumption?
explore the past
Another thing I like to do to tackle the backlog of photos is to explore the past as well. During my monthly review, I go back to the same month of a previous year and organize those photos too, that way I am progressively working on the backlog, but not sitting down and saying to myself , ‘ok, time to sit down and review photos from 1998 to the present day!’ Breaking it up into chunks is definitely much better for my sanity and my motivation.
3. define a purpose
Give yourself a purpose to organize your photos.
I started working on a project many years ago, called Visual Inventory. You can read more about this project here, but essentially, it is about associating two images together that may otherwise be apparently unrelated. This is an idea I got from the English architect John Pawson.
I loved the idea so much, I started making my own visual inventory. I think it is a great way to think outside the box, relate things that otherwise you might not have thought about and cross pollinate ideas. It’s also a fantastic way to delve back in time and into your archives to review and blow the dust off those digital images that we took so lovingly over the years. A way to bring them to the light of day and really consider them. That way at least all those ideas you had, that inspiration that sparked you are accessible to you and not buried under an avalanche of other pictures.
I post mine here on my website, but you could post on social media, keep a special folder or album on your device (see step 1), or even print them out and make a gallery on your wall. Maybe you want to print a small photo book (or two or three…) to be able to flip through and use as inspiration juice.
As long as you have an objective, a purpose in mind, you will be much more motivated to trawl through the archives.
So, there you have it, 3 ways for creatives and quilters to organize their photos.
I hope this journal post has given you some food for thought and even the inspiration to start tackling those photos you have. I’d love to know what strategies you have for tackling your photos. Leave a comment and share your tactics below. And… don’t forget to schedule your photo organization time on the calendar!
I need to implement these tips more. I categorize my photos in bursts but not consistently. I like your idea to schedule it weekly, then it will probably turn into automatically after I take photos.
This is all so good!
Awesome Jo! Yes, the consistent action is gold, because then you don’t have to deal with 9000 photos in one go! (I’ll let you in on a secret.. I have to implement these tips more too! haha)
(Or better, your 3 and 1 option are the ones I use most). And: that yellow tube photo is great!!!
Yes, of course I love the colours of that photo! Eraclea Mare. I guess review (step 2) is almost an integral part of step 1 (categorise). Thanks for sharing your thoughts.
“Define a purpose”: I love that part! So, among plenty pf photos (hundreds in one day?) I pick the top of the iceberg good for that purpose. Then I classify only those selected ones (a bit of a reversed order of your 2 and 3 options?)
Yes! Selection is definitely an important part of the process. And deletion too!! Thanks for your insight Paola. Always appreciate hearing your thoughts.